How to Create Your First Workflow
Building a workflow allows you to orchestrate interactions between platform components and external systems. Since workflows are always contained within a Workspace, ensure you have selected the appropriate environment before starting.
This guide walks you through the process of creating, configuring, and publishing a workflow to streamline your automation efforts.
Create a Workflow
To create a new workflow, follow these steps:
- Access the Global AI platform dashboard.
- Click on Workflows in the sidebar menu.
- Click the Workspace dropdown and select the desired workspace where you want to create the workflow.
- Click on the Create Workflow button.
- Provide the following details:
- Name: Enter a unique name for your workflow.
- Description: Optionally, provide a description for the workflow.
- Workspace ID: This will autopopulate based on your selected workspace.
- Minutes saved: Specify the duration in minutes for which the system should save the workflow's state.
- Tags: Optionally, add tags to help categorize and identify the workflow.
- Upload Icon: Optionally, upload an icon to visually represent the workflow.
- Upload Dark Icon: Optionally, upload a dark mode icon to visually represent the workflow in dark mode.
- Status: Toggle the status to enable or disable the workflow upon creation.
- Click Create to complete the creation of the workflow.
After creating the workflow, you will see it listed on the Workflows screen with its name, description, and tags.
Add Nodes to the Workflow
Once created, add nodes to your workflow to define its functionality:
- On the Workflows screen, locate the workflow you just created and click on its name to open the workflow editor.
- In the workflow editor, you will see a canvas where you can add nodes.
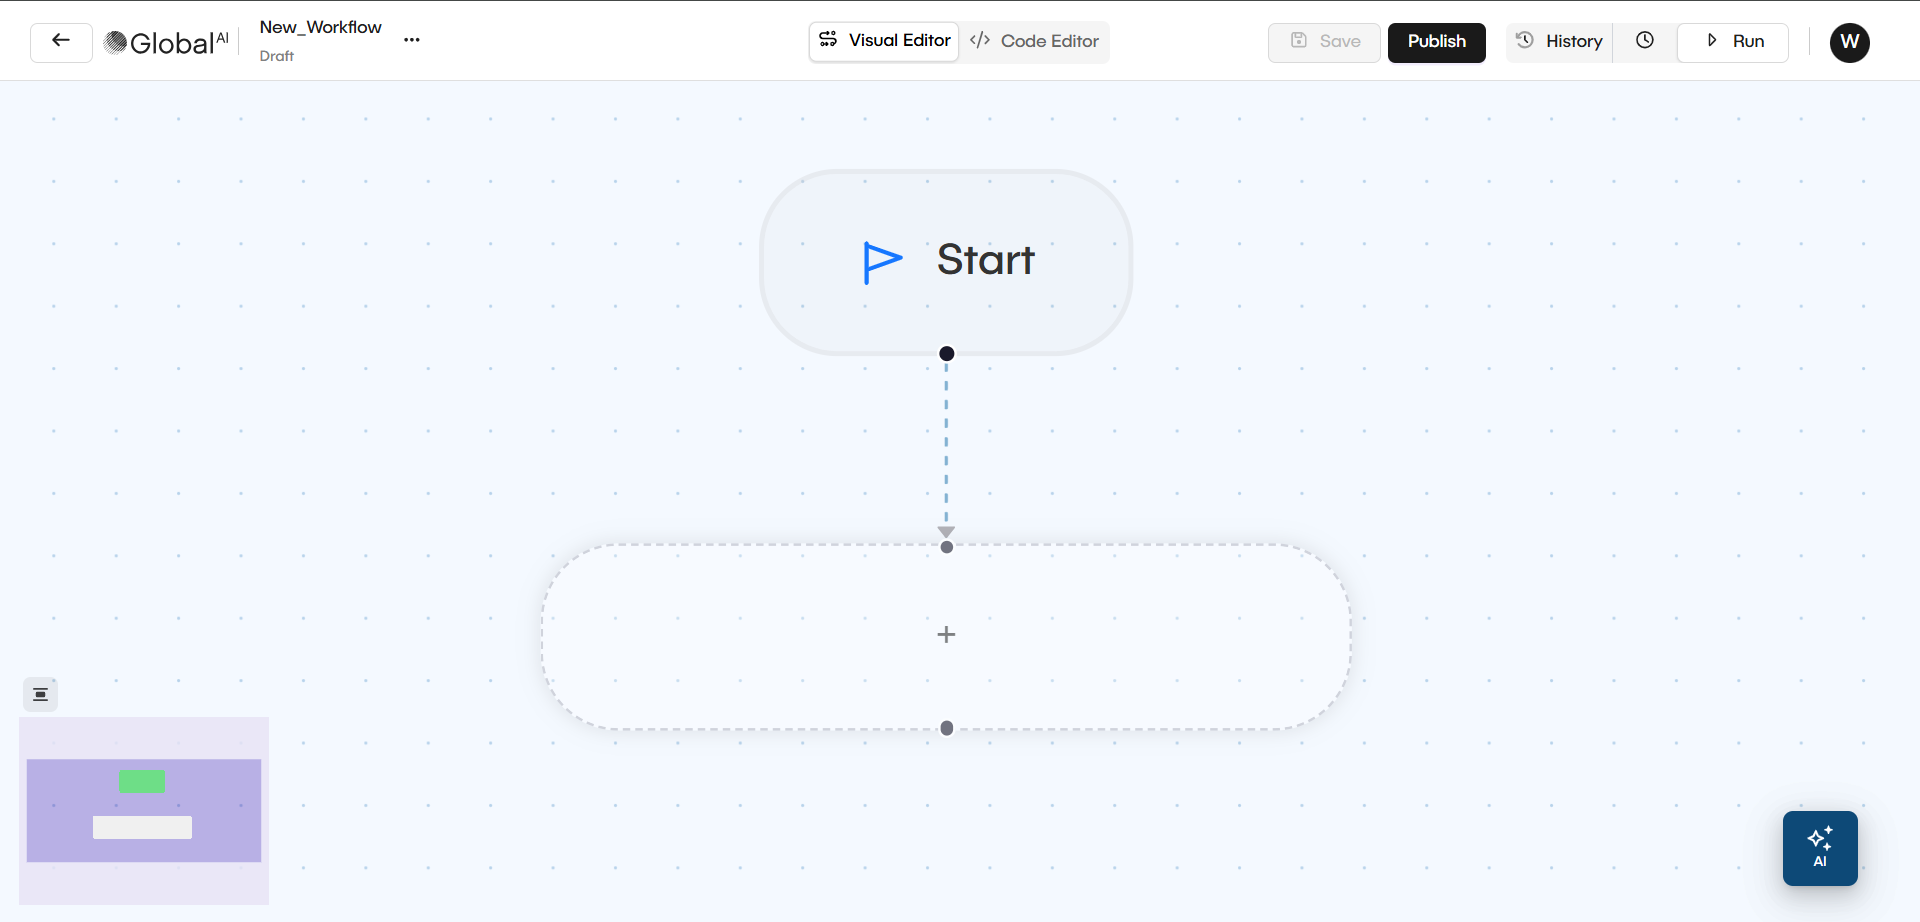
- To add a node, click on the + button on the canvas.
- Configure each node by clicking on it and filling in the required parameters in the configuration panel that appears.
- After configuring a node, make sure to click the Update button in the configuration panel to apply the changes.
- Once you have added and configured the node, click the Save button to save your workflow.
- You can add more nodes to your workflow by repeating steps 3 and 4.
- Make sure to save your workflow after adding or modifying nodes so the system preserves your changes.
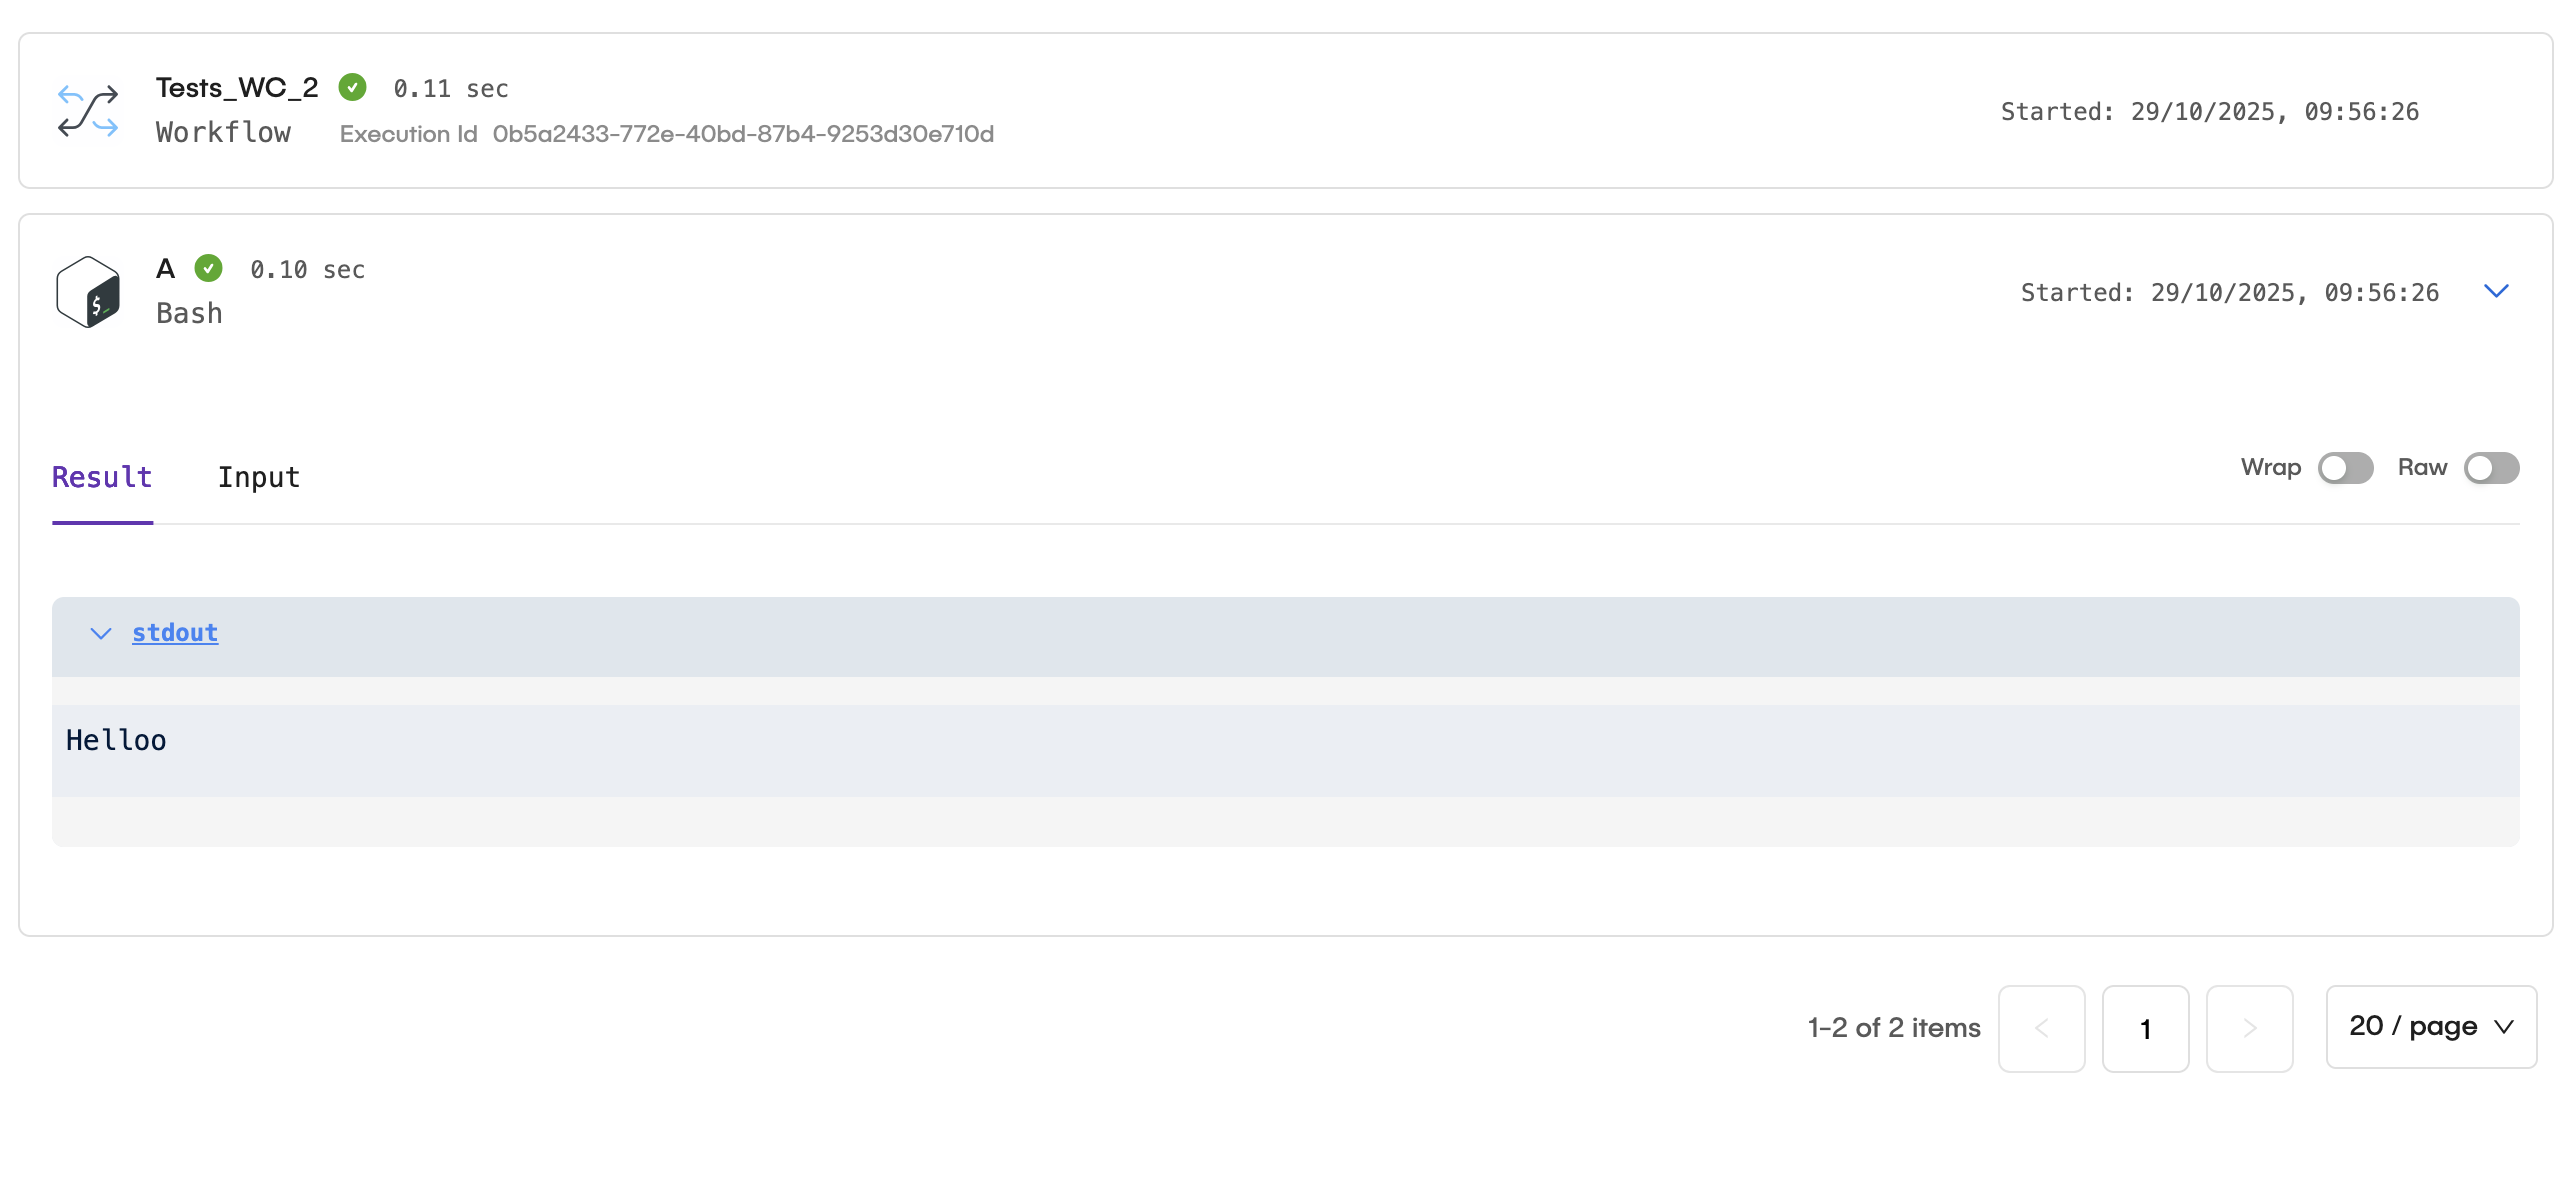
Run the Workflow
To test your automated sequence, you can run it directly from the editor:
- In the workflow editor, click the Run button located at the top right corner of the screen.
- Monitor the execution of the workflow through the logs and output displayed in the workflow editor.
- Review the results and outputs generated by each node once the execution completes.
- You can stop the workflow execution at any time by clicking the Stop button located next to the Run button.
- Review the logs for any errors or issues that may have occurred during the execution of the workflow.
- You can rerun the workflow as needed by clicking the Rerun Execution button.
Publish the Workflow
Once the workflow meets your requirements and functions correctly, you can publish it to make it available for production use. To publish the workflow, follow these steps:
- In the workflow editor, click the Publish button located at the top right corner.
- Confirm the publication in the dialog that appears.
- After publishing, the workflow will become available for execution via triggers, schedules, or API calls, and users can access it from the Workflows screen.
Publishing your workflow creates a new revision. Every time you save and publish changes, the platform tracks these versions for better lifecycle management.
Related articles
Now that you know how to create and manage workflows, you can explore more about variable management and usage in the Global AI platform.